Highveld Garlic: The Complete Guide to Planting and Curing
A technical manual for mastering vernalization, bulb expansion, and long-term storage of garlic in the Gauteng climate.
1. Introduction: The Patient Harvest
In the Evergreen Hideout, garlic is considered the ultimate test of a gardener’s foresight. Unlike quick crops like spinach or radishes, garlic requires up to eight months of growth, occupying valuable bed space through the coldest and driest months of the year. However, the reward for this patience is a crop that is nutritionally dense, medically potent, and possesses a flavor profile far superior to bleached, imported bulbs found in supermarkets. Growing garlic in Soshanguve requires a technical understanding of "vernalization"—the process where the plant uses the winter chill to trigger the division of a single clove into a multi-clove bulb.
Vernalization is not just "cold"; it's a specific duration of chilling. Garlic requires 4-8 weeks of soil temperatures between 0-10°C to initiate clove formation. On the Highveld, our winter provides this perfectly, but timing is everything.
- Ideal Window: Plant so that the clove establishes roots in autumn (warm soil) and then experiences the core of our winter chill (June-July) while it's a young plant. This is why February-April planting is non-negotiable.
- The "Round" Consequence: If planted too late (May-June), the clove may not receive sufficient chilling hours and will produce a "round"—a single, large clove that never divides. While edible, it represents a failed harvest of your intention.
- Microclimate Management: In very frost-prone pockets, the soil can get too cold (<0 acts="" an="" as="" blanket="" deep="" growth.="" halting="" ideal="" in="" insulating="" is="" keeping="" li="" mulch="" range.="" root="" the="" this="" vernalization="" where="" zone="">
Biological Units: Every clove is a potential bulb if the technical requirements are met.
Because garlic is in the ground for such a long duration, it must be planted into a soil environment that is structurally stable and biologically active. This makes it an ideal crop to follow the cycle of engineering deep fertility with the trench method. The high organic matter in these trenches acts as a thermal insulator for roots during our frosty July nights and ensures that the plant has access to steady, slow-release minerals required to build a robust bulb. Without this foundational soil work, garlic in heavy clay will often produce "rounds"—single, undivided cloves that lack the characteristic flavor and marketability we desire.
Garlic hates "wet feet." The trench method's improved drainage is its primary benefit. Enhance it further with these amendments at bed preparation:
- Drainage Layer: In the bottom of the trench, add a 5cm layer of coarse sand or fine gravel before adding your compost mix. This is critical in our high-clay soils to prevent winter waterlogging.
- Sulfur & Potassium: Mix in 1 cup of gypsum (calcium sulfate) and 1 cup of wood ash per square meter into the trench fill. The sulfur is a precursor for allicin, and the potassium promotes bulb size and skin quality.
- Biochar Integration: Incorporating 5% biochar (by volume) into the trench fill provides a permanent, porous housing for moisture and nutrients, creating the ideal steady-state environment for the long haul.
2. Why This Topic Matters: Photoperiod and Sulphur
The primary reason to grow your own garlic is the control over variety and chemical exposure. Most commercial garlic is treated with growth inhibitors to prevent sprouting and methyl bromide for pest control, both of which degrade the biological value of the bulb. By growing your own, you can focus on "Hardneck" or "Softneck" varieties that are adapted to our 10 to 12-hour day lengths. Garlic is also a bio-accumulator of Sulphur, which it uses to create the Allicin compound responsible for its health benefits. This Sulphur also acts as a natural systemic repellent, which is a core component of the organic pest master manual.
Not all garlic is created equal. Your choice dictates planting time, harvest window, and storage life.
- Softneck (Allium sativum var. sativum):
- Characteristics: More cloves per bulb, longer storage life (6-12 months), does not produce a hard central scape. Braidable.
- Best for Soshanguve: Ideal for our milder winters. Excellent for long-term storage. Varieties like 'Italian Late' perform well.
- Hardneck (Allium sativum var. ophioscorodon):
- Characteristics: Fewer, larger cloves. Produces a edible scape. More complex flavor. Shorter storage life (3-6 months). Requires a definite cold period.
- Best for Soshanguve: Can be grown but may perform better in slightly colder microclimates. The scape is a bonus harvest. Varieties like 'Chesnok Red' are worth trialing.
Beyond its culinary use, garlic is a critical tool for soil health. The root exudates of garlic have antifungal properties that can help suppress soil-borne pathogens. This makes garlic an excellent companion or rotation crop for vegetables that are susceptible to wilt. To maximize this effect, the soil must have excellent drainage, as identified in your soil texture testing. If your clay content is too high, garlic will struggle with "rust" or bulb rot, making the integration of porous carbon housing provided by biochar and carbon sequestration a technical necessity for success.
This is a strategic use of garlic within your Pest Management and crop rotation plan.
- Preceding Crop: Plant garlic after a heavy feeder like corn or squash. The trench method will have left residual fertility.
- Following Crop: The sulfurous compounds left in the soil after harvesting garlic can mildly suppress nematodes and fungal pathogens. Follow garlic with a crop from a different family that benefits from this, such as tomatoes or legumes. Do not follow with other alliums (onions, leeks).
- Companion Planting: Interplant garlic with roses (to deter aphids) or near fruit trees. Its strong scent can confuse some pest insects.
3. The Technical Timing and Planting Protocol
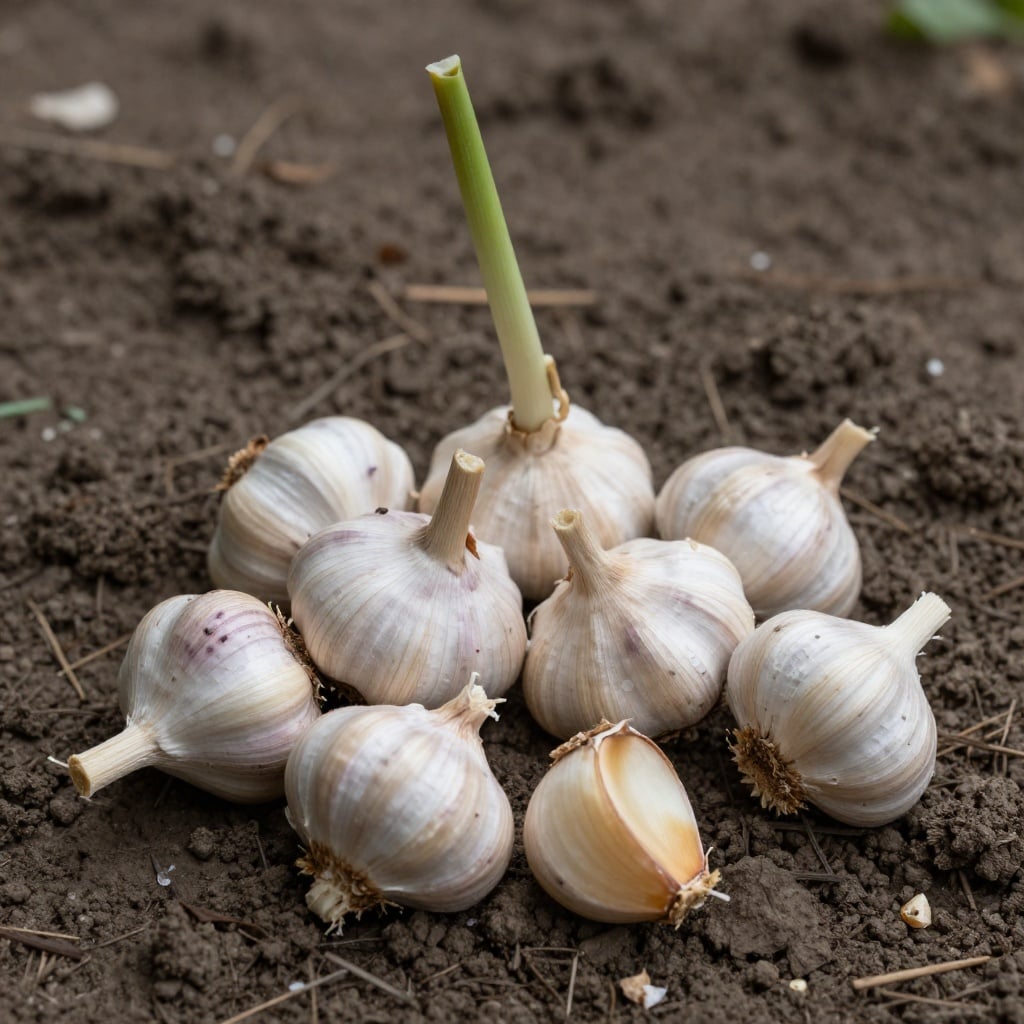
In the Highveld, the most critical planting window is between February and April. This allows garlic to establish a strong root system while the soil is still warm, before the temperatures drop enough to trigger vernalization. We select only the largest, outer cloves from a bulb for planting, as clove size is directly correlated to the eventual size of the bulb. The cloves are planted "pointy side up" about 5cm deep and 15cm apart. This spacing is wider than onions because garlic requires more airflow to prevent leaf rust that can occur during our late-summer rains.
Treat each clove as a sacred seed stock. Follow this ritual for maximum success:
- Source Your Seed: Use locally adapted, organically grown garlic. Do not plant supermarket garlic (often treated). Break the bulb apart only on planting day to prevent the basal plate from drying out.
- Clove Grading: Separate cloves by size. Plant only the largest, plumpest outer cloves. Use smaller inner cloves for cooking or plant in a tight cluster for garlic greens.
- Pre-Plant Soak (Optional but Beneficial): Soak cloves for 15 minutes in a solution of 1 litre water, 1 tbsp baking soda, and 1 tbsp liquid seaweed. This disinfects and provides a mild nutrient boost.
- Planting Depth & Technique: In our climate, plant 5-7cm deep (measured from clove tip to soil surface). Deeper planting promotes winter stability and cooler basal temperatures for vernalization. Firm the soil gently over the clove.
Thermal Protection: Mulching protects the soil from temperature spikes and moisture loss.
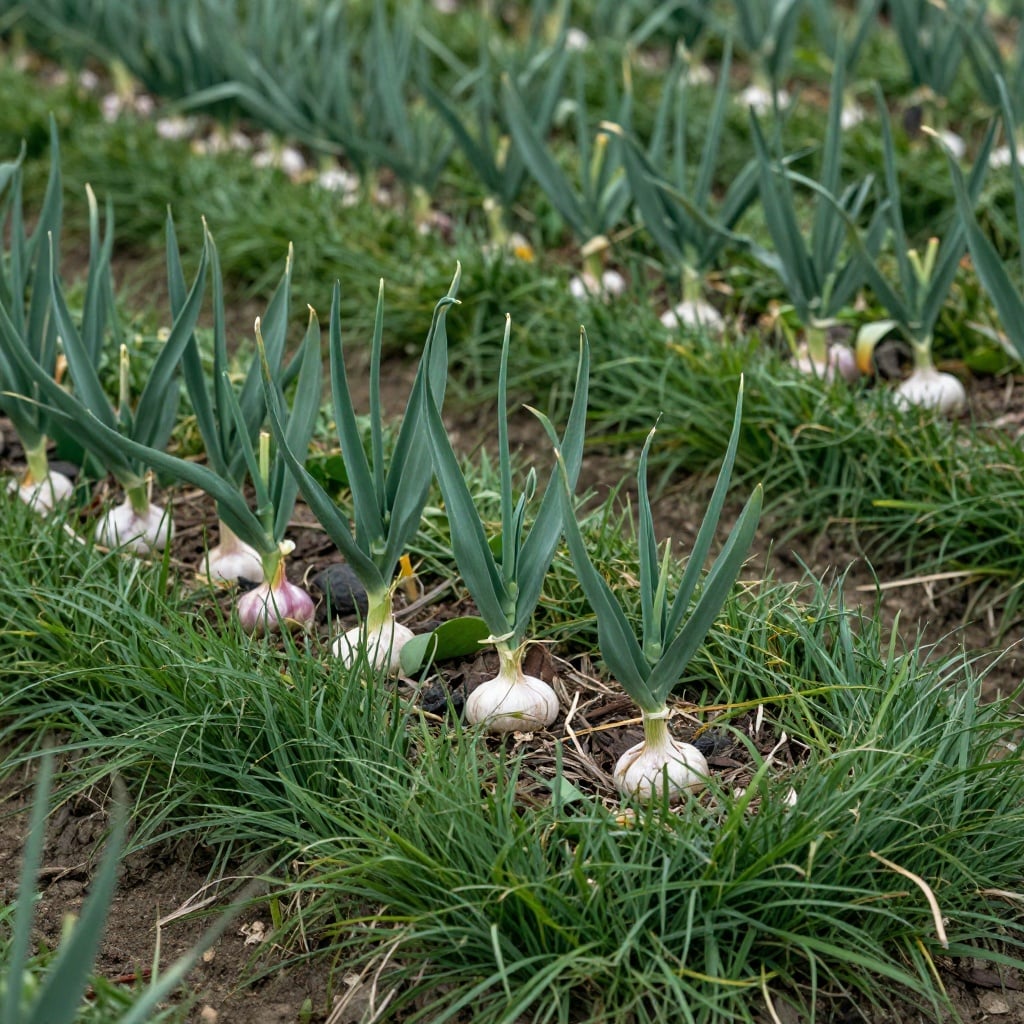
Once the cloves are in the ground, they must be covered with "Soil Armor" techniques found in our guide on using grass mulch. Garlic is a poor competitor with weeds, and the mulch provides a barrier that prevents weed germination while keeping the soil moisture consistent. Because garlic is a "long-haul" crop, it is vital to maintain this mulch layer throughout the winter. As the leaves emerge, we supplement their growth with nitrogen-rich "Liquid Gold" from your worm farm or compost tea to ensure the "factory" of the plant is large enough to support a big bulb.
Garlic feeding follows a clear three-phase pattern aligned with its growth stages.
- Phase 1: Root Establishment (Autumn): After planting, water in with a weak solution of worm tea or compost tea to stimulate root growth and inoculate the rhizosphere.
- Phase 2: Leaf Growth (Winter to Early Spring): As green leaves appear, side-dress with a nitrogen source like blood meal or apply a monthly drench of nitrogen-rich manure tea. This builds the photosynthetic "engine." Stop nitrogen applications by early September.
- Phase 3: Bulb Formation (Spring): Once the days lengthen and bulbing begins (around September), switch to a potassium-focused feed. A bi-weekly drench of wood ash tea (steeped for 48 hours) or comfrey tea is ideal. This is the most critical feed for bulb size and storage quality.
4. Managing Scape and Harvest Signal
In mid-spring, Hardneck varieties will produce a "scape"—a long, curly flower stalk. A critical technical intervention is to snap these scapes off as soon as they appear. If left on the plant, the garlic will divert its energy into producing flower heads and bulbils at the expense of expanding the main bulb. These scapes are a gourmet delicacy and should be harvested. As the weather warms up in October and November, we shift our fertilization to potassium and mineral-rich inputs found in agricultural wood ash, which helps thicken the protective skins of the bulb and prepares the plant for dormancy.
Harvesting scapes is a precise art with a direct yield impact.
- Timing: Harvest the scape when it has made one full curl but before it straightens to point upward. This is when it is most tender and the plant has invested minimal energy into it.
- Method: Use your thumb and forefinger to snap or cut the scape off as low down as possible without damaging the leaves. Do not pull.
- Yield Benefit: Studies show removing the scape can increase bulb size by 15-30%. The plant redirects energy from reproduction back into the bulb.
- Culinary Use: Scapes have a mild garlic flavor. Chop and use in pestos, stir-fries, or pickles.
The signal for harvest is not based on the calendar, but on the leaves. When the bottom three or four leaves have turned brown and died, but the top five or six are still green, the garlic is at its technical peak. If you wait until all leaves are brown, the protective skins will have rotted away in the wet soil, reducing the storage life of your harvest. After lifting the bulbs, they must be "cured" in a shaded, airy place for four weeks. This curing process allows the energy from the remaining green leaves to flow back into the cloves, concentrating the sugars and ensuring the Hideout has a supply of garlic that will last until the next year's harvest.
This is the most delicate part of the process. Mishandling here can ruin months of work.
- The Lift: On a dry morning, use a garden fork to gently loosen the soil 10cm away from the stem, then lift the entire plant. Do not pull by the stem. Brush off loose soil; do not wash.
- Immediate Handling: Keep the bulbs out of direct sunlight. Bruised or sun-scalded garlic will not store well.
- Curing Setup: Hang bulbs in small bunches or lay them in a single layer on a wire rack in a shaded, dry, well-ventilated space (e.g., a covered porch, shed, or well-ventilated room). Ensure airflow around every bulb.
- Curing Duration: Cure for 3-4 weeks. The outer skins will become papery, the neck will tighten, and the roots will shrivel. When the stem is completely dry and the outer wrapper rustles, curing is complete.
- Final Preparation: Trim roots to 1cm and cut stems to 2-3cm (or leave long for braiding softnecks). Store in a cool (10-15°C), dark, dry place with good air circulation. Mesh bags or hanging braids are ideal.
5. Summary and Your Next Move
Mastering Highveld garlic is a transformative experience that teaches the value of seasonal rhythm and soil preparation. By respecting the needs for vernalization, managing scapes, and timing your harvest with technical precision, you can produce a crop that is both a culinary treasure and a biological shield for your garden. At the Evergreen Hideout, we treat the garlic crop as a long-term investment in our health and our soil’s diversity, anchoring the productivity of our homestead.
Integrate these steps into your yearly gardening cycle for perpetual garlic success.
- February-April (Planting): Prepare bed with trench/drainage/amendments. Select and plant cloves. Mulch heavily.
- May-July (Vernalization): Maintain mulch. Ensure soil is moist but not waterlogged. Apply first nitrogen feed as leaves appear.
- August-September (Spring Growth): Continue monthly nitrogen feeds. Watch for Hardneck scapes and remove them.
- October-November (Bulb Bulking): Switch to potassium feeds (wood ash/comfrey tea). Reduce watering as leaves begin to senesce.
- November-December (Harvest): Monitor leaf die-back. Harvest based on the 50% green leaf rule. Cure properly for 3-4 weeks.
- January Onwards (Storage & Planning): Store cured bulbs. Select your largest, best-formed bulbs to set aside as "seed garlic" for the next planting cycle.
Are you ready to select your cloves for this season? I want to know if you have a favorite local variety or if you have struggled with "rust" on your garlic leaves in the past. Are you planning to try scape-removal technique this year, or are you looking for more advice on curing in our humid summer weather? Share your garlic-growing plans and your soil questions in the comments below. Let us work together to fill the Evergreen Hideout with the most potent and delicious bulbs in Soshanguve!