The Fermentation Station: Making Probiotic Pickles from the Garden
A technical manual for utilizing salt-brine salinity and anaerobic conditions to foster beneficial Lactobacillus populations.
Fermentation is the original biotechnology, a way to collaborate with microbes to preserve and enhance our food. This guide moves beyond simple recipes to explain the *why* behind each step, empowering you to create safe, delicious, and nutritious ferments from any garden bounty.
1. Introduction: The Biological Alchemy of Salt
In the Evergreen Hideout, we view fermentation as the final biological transformation of our harvest. It's where we shift from being growers to being conductors of a microbial orchestra. Unlike pickling with vinegar, which uses acidity to kill all microbial life and create a sterile environment, lacto-fermentation uses a precise salt-brine concentration to selectively foster Lactobacillus bacteria. These beneficial microbes consume the natural sugars in our vegetables and convert them into lactic acid, a natural preservative that prevents spoilage while enhancing the nutritional profile of the food.
This process works because salt performs three critical technical functions at once:
- Selective Pressure: It suppresses water-loving spoilage organisms (like putrefying bacteria and molds) that cause rot, while salt-tolerant Lactobacillus species survive and thrive.
- Osmotic Action: It draws water, sugars, and nutrients out of plant cells through osmosis, creating the nutrient-rich brine that feeds the fermentation.
- Enzyme Control: It firms vegetable texture by drawing out excess water that can lead to mushiness, and it slows down the plant's own pectin-breaking enzymes.
The result is a stable, acidic environment where food is preserved without heat, electricity, or chemical additives. This transformation turns a simple cucumber or cabbage into a biologically active “superfood” teeming with probiotics that support human gut health, improve nutrient bioavailability, and even generate new vitamins (like B vitamins). Mastering the mechanics of the fermentation station is therefore not optional—it is a technical requirement for any gardener looking to extract maximum biological value from their yield and achieve true food sovereignty.
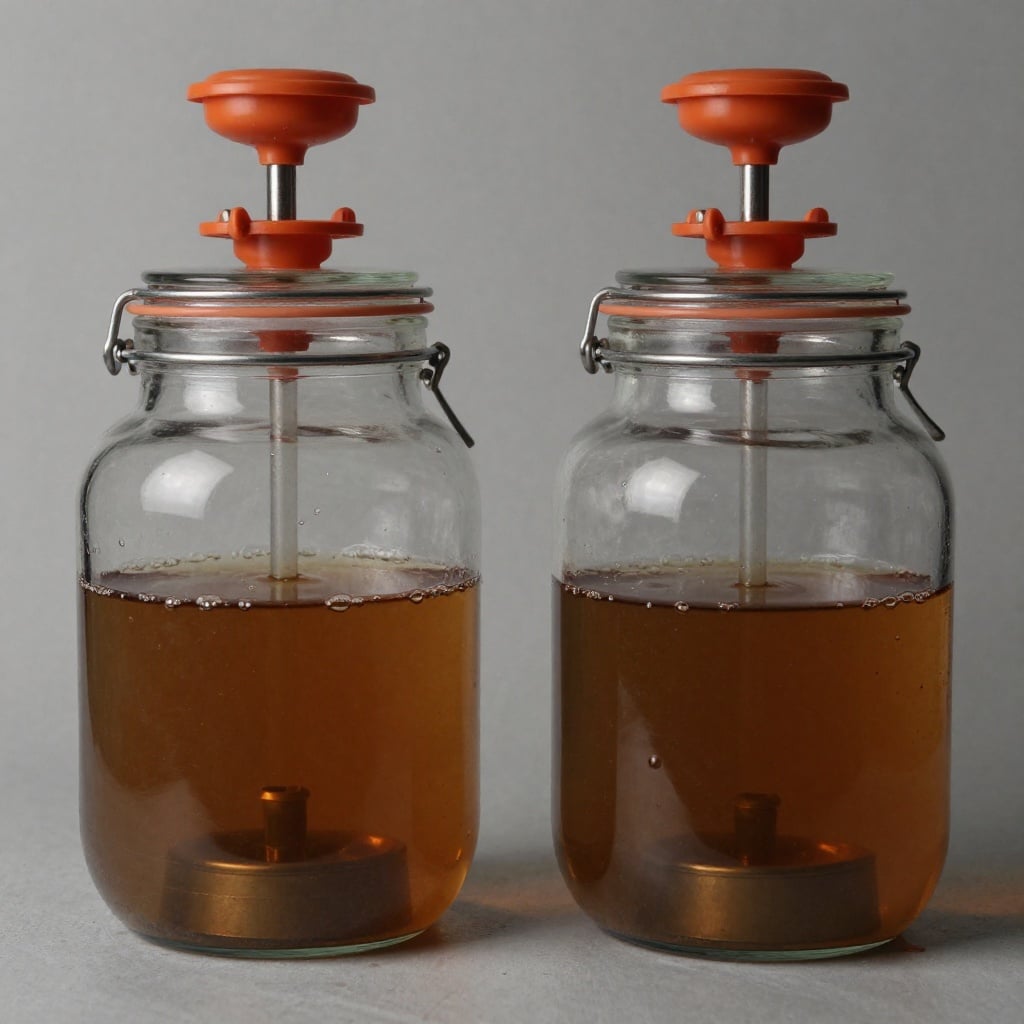
Biological transformation: creating an anaerobic environment enables beneficial bacterial succession and safe fermentation.
The success of your ferment begins long before the jar is sealed. It begins in the soil. Vegetables grown through engineering deep fertility with the trench method develop superior characteristics for fermentation:
- Higher Natural Sugar Levels: More sugars mean more fuel for the Lactobacillus, leading to a faster, more robust fermentation and better final acidity.
- Thicker Cell Walls: Healthy plants have stronger structures that resist breaking down into mush during the weeks of fermentation.
- Greater Mineral Density: Minerals like calcium and magnesium support bacterial metabolism and enzyme function, leading to a more predictable ferment.
We also prioritize produce protected by heavy organic mulching, as outlined in our guide on soil armor. This approach prevents soil splash-back during rain events, keeping low-hanging crops like cucumbers free from competing soil microbes that could introduce off-flavors or pathogens. This is where soil biology intersects directly with human microbiology, linking garden health to gut health in the most tangible way.
2. Why This Topic Matters: Pathogen Exclusion
The single most important technical principle in fermentation is oxygen exclusion. This is the non-negotiable rule for safety and success. Beneficial Lactobacillus species are facultative anaerobes, meaning they thrive best in the absence of air. In contrast, most spoilage molds and pathogenic bacteria (like botulism) require oxygen to survive and reproduce.
When vegetables float above the brine line, three failures occur simultaneously:
- Oxygen Exposure: Oxygen enters the system at the liquid-air interface, creating an aerobic zone.
- Mold Colonization: Airborne molds (which require oxygen) land on exposed plant tissue and begin to grow, often producing mycotoxins.
- Ecological Shift: The ferment shifts from a controlled, acidic preservation process to uncontrolled decay and potential pathogen growth.
By using fermentation weights (glass, ceramic, or a boiled stone) to keep all plant material submerged, we create a sealed biological environment where acidity rises naturally and suppresses pathogens such as E. coli or Salmonella. This is not guesswork—it is controlled microbial succession, engineering an environment where the good guys win every time.
Equally critical is the quality of the water used in the brine. Municipal water supplies are treated with chlorine or chloramines, both of which are engineered to kill bacteria in our water pipes. If used untreated, they will do the same in your ferment jar, stalling or completely halting fermentation by killing the very Lactobacillus we want to cultivate.
This is why we rely on clean, chemical-free water sourced from rainwater harvesting. This water is:
- Microbe-Friendly: Free from chemical disinfectants that would sabotage the process.
- Biologically Neutral: Has a balanced pH and minimal dissolved salts, providing a clean slate for fermentation.
- Ideal for Activation: Allows the native Lactobacillus on the vegetable skins to activate immediately without interference.
Technical water quality is the silent partner in every successful ferment. If you must use tap water, let it sit uncovered for 24 hours to allow chlorine to gas off, or boil and cool it.
3. The Technical Protocol for Brine and Submergence
The standard technical ratio for a wild (uninoculated) vegetable ferment is a 2 percent to 3 percent salt brine by weight. This ratio is the sweet spot: strong enough to suppress harmful microbes and draw out vegetable juices, while remaining hospitable to Lactobacillus populations.
The Step-by-Step Protocol:
- Calculate & Dissolve: Weigh your water. Dissolve 20–30 grams of non-iodized, additive-free salt (sea salt, kosher salt, pickling salt) per liter of water. Iodine and anti-caking agents can inhibit fermentation and cause cloudiness.
- Pack & Submerge: Pack cleaned, trimmed vegetables tightly into a sterilized jar, leaving at least 3 cm of headspace. Pour the brine over, ensuring all material is completely submerged. Tapping the jar helps release air bubbles.
- Apply Mechanical Force: Place a fermentation weight directly on top of the vegetables to maintain submergence even as CO₂ bubbles dislodge them.
- Seal with an Airlock (Recommended): Fit the jar with an airlock lid. If using a standard lid, do not screw it on tightly.
Salt acts as a selective biological filter, shaping which organisms survive. For optimal texture, we rely on crops grown with balanced minerals from agricultural amendments. Calcium-rich vegetables (like kale stems or green beans) maintain firm pectin structures, preventing mushy ferments. A lack of calcium can lead to disappointing, soft pickles.
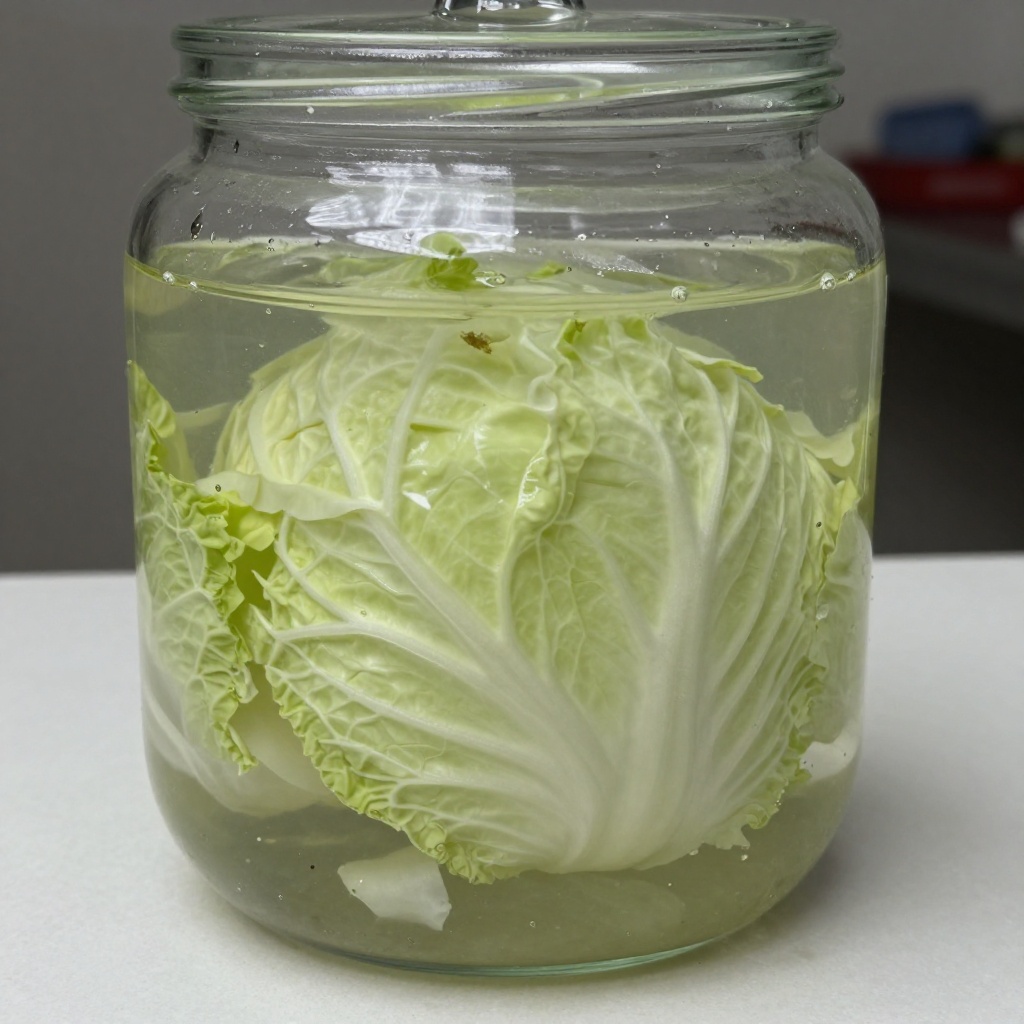
Mechanical submergence: keeping produce below the brine line is the most critical step for fermentation safety and final quality.
The Fermentation Timeline & Gas Management:
During the first 3-7 days, fermentation activity is most vigorous. As sugars are consumed, CO₂ gas is released, creating bubbles and pressure. This pressure must be managed to prevent jar explosions.
An airlock performs two essential tasks:
- Pressure Release: Allows heavier-than-air CO₂ to escape safely while forming a protective blanket over the brine.
- One-Way Valve: Prevents oxygen from re-entering the jar, maintaining the crucial anaerobic environment.
If no airlock is used, you must "burp" the jar daily by slightly loosening the lid to release pressure, then retightening. This hands-on management mirrors the daily observation and condition-checking required for a DIY worm farm. In both systems, success depends on maintaining stable, life-supporting conditions for your microbial or invertebrate livestock.
4. Curing and Long-Term Stability
Active fermentation (bubbling) typically slows after 7–14 days at a stable Highveld room temperature (18-22°C is ideal). At this stage, the lactic acid concentration is high enough to preserve the food, and the process must be slowed to preserve flavor, texture, and probiotic viability. If left at room temperature, fermentation will continue until all sugars are gone, often resulting in an overly sour, mushy product.
This slowing is achieved through cold storage:
- Refrigeration or a Cool Cellar (below 10°C): Drastically reduces bacterial metabolic activity.
- Flavor Development: The flavors continue to meld and mellow in the cold, without further acidification.
- Extended Shelf Life: Properly fermented and refrigerated vegetables can last six months to a year, with live probiotics remaining active.
This approach follows the same “Arresting the Biological Clock” logic outlined in our guide to drying and preservation, with the key difference being that the microbes remain alive, dormant in the cold, ready to reactivate in your gut.
The Crispness Factor – Tannins:
To enhance and preserve crispness, we often add tannin-rich leaves. Oak, grape, horseradish, black tea, or fig leaves contain natural tannins that bind with pectins in plant cell walls, reinforcing structural integrity and slowing enzymatic breakdown. Add a clean leaf or two to the bottom of your jar before packing. This traditional technique complements modern microbial control, producing ferments that are both technically sound, deeply nourishing, and pleasurably crunchy.
5. Summary and Your Next Move
The fermentation station is a precision system for preservation and nutrition. It democratizes food security, turning surplus into a stable, health-promoting staple. By mastering these core principles:
- Accurate 2–3 Percent Brine Ratios (by weight, not volume),
- Total Anaerobic Conditions maintained by weights and airlocks,
- Controlled Curing through timely cold storage,
you transform raw harvests into shelf-stable, probiotic-rich food. Each jar is a direct reflection of the health of the soil, the purity of the water, and the disciplined technique of the gardener. It is the culmination of the Hideout's cycle.
Your First Ferment Checklist:
- ✅ Select fresh, firm, garden-fresh vegetables.
- ✅ Use non-iodized salt and chlorine-free water.
- ✅ Calculate brine at 2.5% (25g salt per liter of water).
- ✅ Pack jar tightly, submerge completely with a weight.
- ✅ Fit with airlock or plan to burp daily.
- ✅ Ferment at room temp away from direct sun for 1-2 weeks.
- ✅ Taste test. When tangy to your liking, move to cold storage.
Are you ready to start your first ferment? Whether you are harvesting cucumbers for kosher-style dills or planning a batch of sauerkraut from Soshanguve cabbages, share your questions and experiences below. What's your favorite vegetable to ferment? Have you encountered kahm yeast or other fermentation puzzles? Let’s keep the Evergreen Hideout a place where biology works for us, season after season, jar after jar.