Onions from Seed: Timing Your Crop for South African Climate
A technical manual for mastering photoperiodism and nutrient timing to ensure large, storable bulbs in Highveld soil.
1. Introduction: The Photoperiod Precision
In the Evergreen Hideout, onions are often misunderstood because their growth is dictated by an internal biological clock that responds to day length rather than just temperature. Unlike many other vegetables, an onion plant must reach a specific size before it experiences a certain number of daylight hours. In Soshanguve, this means our sowing window is incredibly precise; sow too early, and the plant may bolt (go to seed) before summer even arrives; too late, and the bulb won't reach full size. Growing onions from seed—rather than "sets"—gives us total control over variety adaptation. We can select short-day varieties like "Texas Grano" or "Pyramid" that are specifically bred to perform in our latitude. This precision allows us to produce massive, storage-quality onions that are often unavailable or expensive in stores, reinforcing the self-sufficiency at the core of our Vegetables production.
Our latitude (approx. 25° S) dictates a strict schedule. The critical "bulbing" trigger for short-day onions occurs when day length reaches 11-12 hours. This happens around mid-spring for us. Your sowing date must ensure the plant is mature enough by this trigger.
- Optimal Sowing Window: Sow seeds indoors or in a protected nursery from mid-February to late March. This gives seedlings 6-8 weeks of growth before transplanting in April/May.
- The Bolting Risk: If sown too early (January), seedlings may become too large and vernalize (experience chilling) during winter, tricking them into bolting in spring instead of bulbing.
- The Size Target: At transplant, seedlings should be at least "pencil thickness" at the base. A smaller seedling will not have the carbohydrate reserves to support rapid bulbing when the photoperiod signal hits.
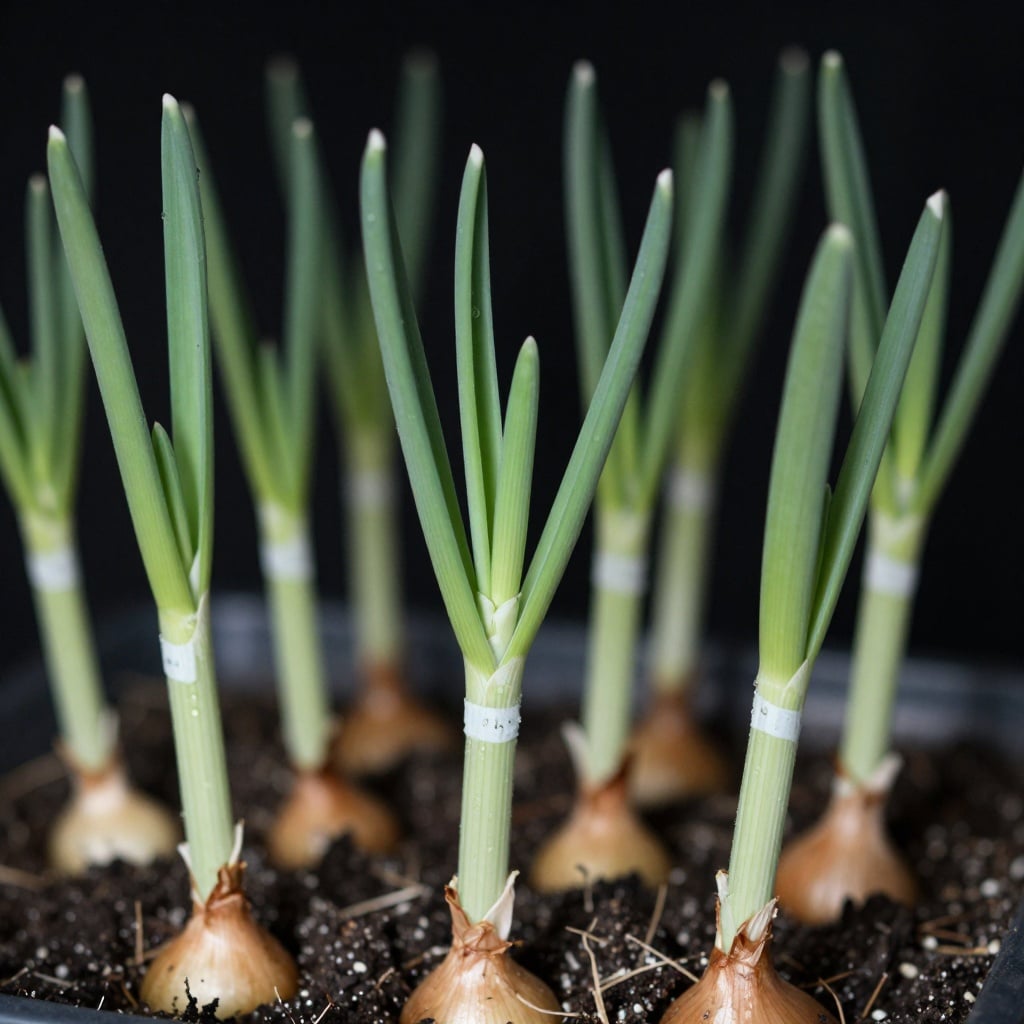
The Target: Seedlings must be robust (pencil thickness) before they are transplanted into main beds.
Growing from seed requires a patient, technical approach to nursery management. Because onions are slow to start, they are highly vulnerable to being smothered by weeds or dried out by the intense Highveld sun. This is why we begin our seeds in protected trays where we can manage moisture and provide a "sterile" environment. This success is the foundational step in creating a high-yield garden and relies on the foundational principles found in engineering deep fertility with the trench method. The deep organic matter in these trenches provides a slow-release nutrient reservoir that onions need to sustain their long season. By starting with this infrastructure, we ensure the heavy-feeding nature of onions is supported from day one.
Seed starting is a non-negotiable skill for onion success. Follow this protocol:
- Medium: Use a sterile, fine-textured seed starting mix. Onion seeds are small and easily blocked by coarse particles.
- Sowing: Sow seeds 1cm apart, 0.5cm deep, in rows spaced 5cm apart in a tray. Cover lightly with vermiculite.
- Germination: Keep consistently moist (not wet) at 18-24°C. A heat mat can ensure even germination, which should occur in 7-14 days.
- Light & Feeding: Once sprouted, provide maximum light to prevent leggy growth. Feed with a half-strength liquid seaweed solution weekly to build strong cell walls.
2. Why This Topic Matters: Soil Chemistry and "Short-Day" Genetics
The primary reason onions fail in South Africa is the selection of the wrong genetic variety for our latitude. South Africa is primarily a "short-day" onion region, meaning our summer days are shorter than those in Europe or North America. If you plant a "long-day" variety like the famous "Giant Spanish Sweet" in the ground, it will attempt to bulb out long before our calendar permits. This technical distinction is why we prioritize specific short-day cultivars and native varieties. Furthermore, onions are "canaries in the coal mine" for soil drainage. If your soil has a high clay percentage, it likely suffers from poor drainage, leading to root rot. This is why identifying your soil texture is critical. A simple soil jar test will reveal if your soil is heavy clay or sandy loam, informing exactly what amendments are needed for successful expansion. Without this specific technical knowledge, you are essentially guessing in the dark.
Choosing the right genetics is 50% of the battle. Here are proven performers for our latitude:
- Texas Grano 502 PRR: A classic short-day variety known for large, mild bulbs and good storage. Excellent for our climate.
- Red Creole: A reliable, pungent red onion with good disease resistance and decent storage. A staple for the home garden.
- Pyramid (White Grano): Produces large, round, white bulbs. Less storage life than yellow varieties but excellent for fresh use.
- Local Heirlooms: Seek out locally saved seed from other Highveld growers. These are the most genetically adapted to our specific conditions.
Furthermore, onions require a specific nutrient balance. They are heavy feeders of phosphorus and potassium to develop healthy bulbs and skins. However, they are sensitive to the "sulfur" element. If your soil is naturally acidic, you may need to apply lime to raise the pH so these nutrients are bioavailable. We achieve this balance using minerals found in agricultural lime and wood ash. This technical amendment provides the calcium and potassium required for robust skins and storage life, ensuring that our onions don't rot in the pantry. By matching the genetics to the environment and chemistry, we create a self-sustaining harvest that thrives in the specific conditions of the Gauteng Highveld.
Prepare your onion bed 2-3 weeks before transplanting. This recipe is for 1 square meter:
- For Drainage & Texture: Mix in a 10L bucket of coarse sand or fine composted bark if your soil is heavy clay.
- For Phosphorus (Root & Bulb Initiation): Incorporate 2 cups of bone meal or rock phosphate.
- For pH & Calcium: If your soil pH is below 6.0, mix in 1 cup of agricultural lime (dolomitic).
- For Potassium & Trace Minerals: Lightly incorporate 1 cup of sifted wood ash. This provides K for bulbing and skin quality.
This creates the perfect "onion-specific" soil matrix within your prepared trench bed.
3. The Technical Sowing Schedule
In Highveld, the sowing calendar must be calculated backward from your target harvest date. Most "short-day" onions require about 100 to 120 days of growing time before harvesting. For us, this often means sowing seeds in late summer or early autumn to harvest in late spring or early summer. We start our seeds in trays filled with a fine, friable potting mix that ensures good seed-to-soil contact. We avoid planting them directly into the ground initially to prevent washing away by heavy rains and birds.
Map your season using this timeline for a late November harvest:
- Day 0 (Late Feb - Early Mar): Sow seeds in nursery trays.
- Day 45-60 (Mid-Apr - Early May): Transplant pencil-thick seedlings into prepared trench beds.
- Day 75-90 (Mid-Spring): Day length reaches ~12 hours. Bulbing is triggered. Ensure consistent moisture.
- Day 100-115 (Late Nov - Early Dec): Tops begin to fall over. Initiate harvest and curing process.
This schedule leverages the cool autumn and winter for vegetative growth and the warming spring for bulbing.
Transition: Moving seedlings to their final location must happen at the "pencil thick" stage.
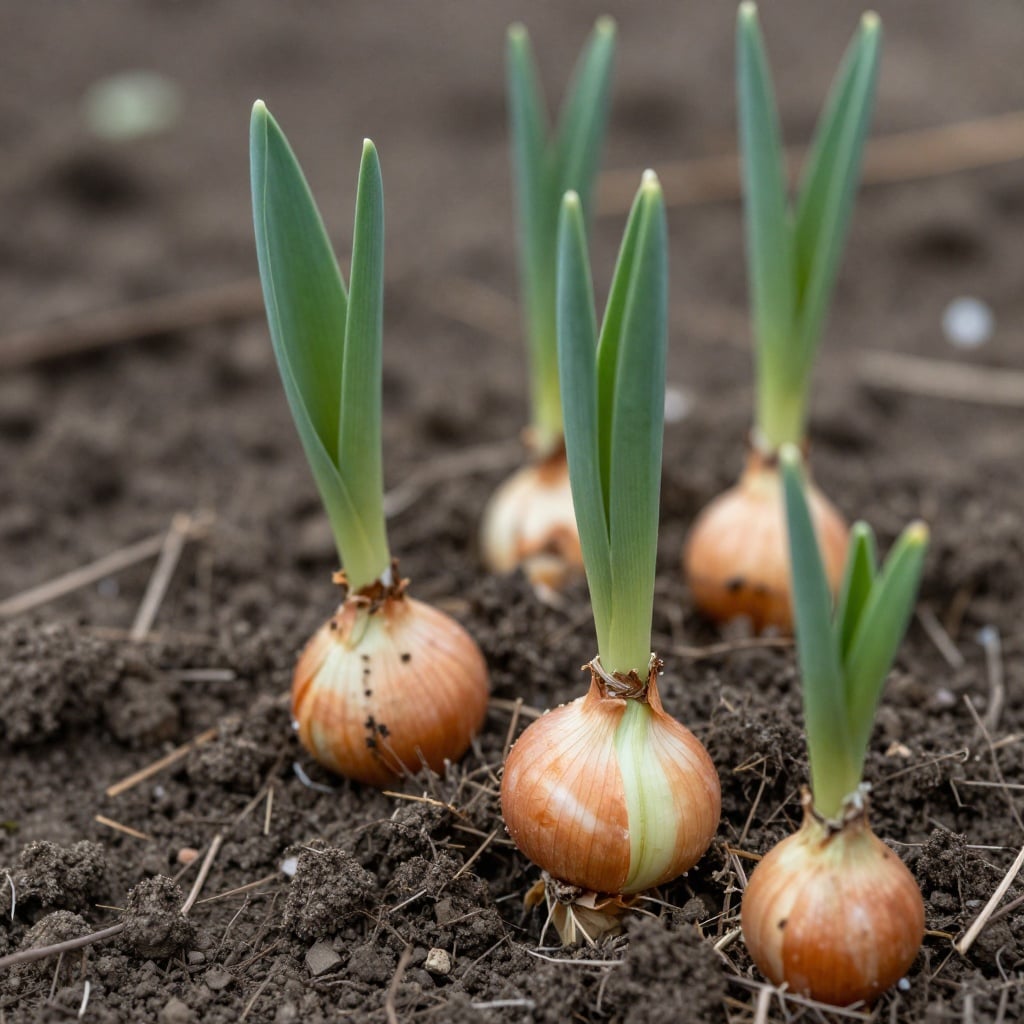
We space our onions 10cm apart in rows that are 20cm apart. This gives the leaves ample airflow to dry quickly after rain, preventing fungal issues like mildew. We also integrate this with "Soil Armor" techniques found in our guide on using maize stalks and grass mulch. This mulch is critical for onions; it maintains a moist, cool root zone, creating a buffer against the harsh Highveld sun. Because we start from seed, we ensure the soil is loose enough for bulbs to expand without physical barriers. This technical preparation of the seedbed is what allows the transition from a fragile seedling to a robust harvester.
Transplanting is a critical stress point. Minimize shock with this ritual:
- Harden Off: Acclimate seedlings to outdoor conditions over 7 days.
- Prepare Holes: Make planting holes 10cm apart, deep enough so the white stem is buried up to the base of the green leaves. Do not bury the green foliage.
- Plant & Water: Set seedling in hole, firm soil gently around the base. Water immediately with a dilute seaweed solution to encourage root growth.
- Mulch Immediately: Apply a 5cm layer of grass clippings or straw around the seedlings, keeping it away from direct stem contact to prevent rot.
4. Targeted Fertilization and Soil Biology
Onions are heavy feeders that require a consistent stream of nutrients to push through their growing season. Because they are grown from seed, they lack the carbohydrate reserves of a mature plant. We address this by applying a nitrogen-rich "Liquid Gold" from our manure and comfrey tea recipes. Comfrey tea is particularly valuable because it is loaded with potassium and trace minerals that strengthen the skins and disease resistance. We apply this tea every two weeks as a foliar spray to stimulate biological activity in the leaves. This liquid uptake is far more efficient than granular fertilizers for onions, which can burn the delicate root systems of seedlings.
Onion nutrition has two distinct phases. Applying the wrong nutrient at the wrong time causes small bulbs or poor storage.
- Phase 1: Vegetative Growth (Transplant to Early Spring):
- Goal: Build a large, healthy "factory" of green leaves.
- Feed: Apply a nitrogen-rich feed every 2 weeks. Use diluted chicken manure tea or fish emulsion. Foliar applications are highly effective.
- Stop: Cease all nitrogen feeding once the bulb begins to swell (you can feel it at the base).
- Phase 2: Bulb Development (Spring to Harvest):
- Goal: Transfer energy from leaves to bulb and build strong, protective skins.
- Feed: Switch to a potassium-rich feed. Apply comfrey tea or wood ash tea (steeped for 48 hours) every 3 weeks.
- Key: Potassium improves dry matter content and storability. It is the most important nutrient for this phase.
However, we must be careful with nitrogen timing. High nitrogen in late season delays bulbing and reduces storage life. As the bulb begins to form, we switch to a potassium-rich diet, often using agricultural lime and wood ash. The potassium strengthens the layers of the onion, ensuring they cure into durable storage crops.
Knowing when to stop watering is as important as feeding. Overwatering near harvest causes thick necks and rot.
- When Bulbs Are Mature: The leaves will start to yellow and tip over naturally.
- The Test: Gently squeeze the neck of the onion (where leaves meet bulb). If it feels soft and the tops are falling, stop watering completely.
- Rationale: Withholding water forces the plant to draw resources from the leaves into the bulb and encourages the neck to tighten and dry, which is essential for curing.
5. Harvesting and Curing
The "neck" of an onion signals that the plant has finished its cycle. When about 50% of the tops have fallen over, the plant is stopping growth. This is the time to pull. Unlike other crops where we might focus on perfect aesthetics, for onions, we prioritize the "cure." Onions must be left in the garden for 1 to 2 weeks to form a papery outer skin. This curing process allows them to store for months. Once cured, we move them into our curing and storage guide. We dry them in a shaded, airy spot, ensuring no moisture is trapped that could trigger rot. This careful post-harvest management ensures our hard work results in a pantry full of high-quality, homegrown onions that last through winter.
Our summer rains can ruin a harvest during curing. This protocol is weather-adaptive.
- Harvest: On a dry morning, gently lift bulbs with a garden fork. Brush off loose soil; do not wash.
- Field Cure (Ideal Weather): If dry weather is forecast, leave bulbs on the dry soil surface for 7-10 days, covering with their own foliage to prevent sunscald.
- Protected Cure (Rain Forecast): Move bulbs immediately to a covered, well-ventilated space like a shed or porch. Lay them in a single layer on racks or mesh.
- Curing Complete: Curing is done when the neck is completely tight and dry, the outer scales are papery, and the roots are brittle. This can take 2-3 weeks in humid conditions.
- Storage Prep: Trim roots to 1cm and cut tops to 2.5cm (or braid if tops are flexible). Store in mesh bags in a cool, dry, dark place with good air circulation.
6. Summary and Your Next Move
Growing onions from seed is a journey of patience and timing. By selecting the correct short-day varieties, managing soil chemistry, and adhering to the Highveld calendar, you can produce a harvest that is superior in flavor and size to anything found in a store. It is a technical discipline that turns a small seed into a massive store of food security. At the Evergreen Hideout, we treat every onion bulb as a solar energy battery, packed with summer sun and ready to power our kitchen for the rest of the year.
Follow this checklist from seed to storage for a guaranteed crop:
- Month 1 (Feb-Mar): Select short-day variety. Sow seeds in sterile mix using nursery protocol.
- Month 2 (Apr): Prepare bed with trench method and soil amendment formula. Harden off seedlings.
- Month 3 (May): Transplant at pencil-thick stage using transplanting ritual. Begin Phase 1 (Nitrogen) feeding.
- Months 4-5 (Jun-Sep): Maintain mulch. Continue bi-weekly nitrogen feeds during vegetative growth.
- Month 6 (Oct): Switch to Phase 2 (Potassium) feeding as bulbing begins. Perform "neck softness" test.
- Month 7 (Nov): Stop watering. Harvest when 50% tops are down. Execute curing protocol for storage.
Are you ready to start your onion seeds? I want to know if you have selected a "short-day" variety suited for our latitude or if you are preparing your trench beds now. Have you tested your soil to understand your drainage profile, or are you planning to use Comfrey tea to feed your onions this season? Share your sowing strategies and your timing calculations in the comments below. Let us work together to make the Evergreen Hideout the most productive garden in Soshanguve!